Before you begin
Make sure you have:
- A Claude Pro or Max account
- A government-issued ID (driving licence or passport) for identity verification (required for auto record location)
- A mobile phone for selfie verification via CLEAR (required for auto record location)
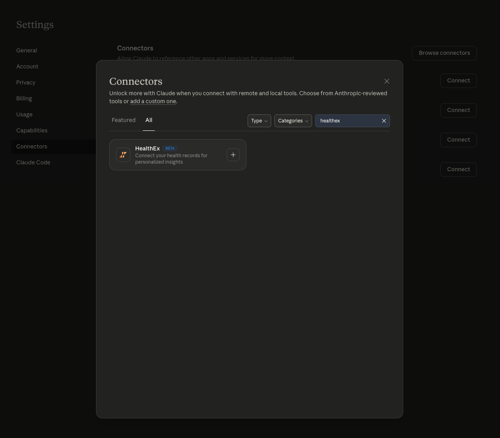
Step 1 — Open Claude Settings and search for HealthEx
- Open Claude and click your profile icon to open Settings
- Click Connectors in the left sidebar
- Click Browse connectors
- Search for "healthex" and click the + button on the HealthEx BETA card
Step 2 — Review permissions and click Continue
- A "Connect HealthEx" dialog will appear
- Review the key points: your data won't be used to train models; you can disconnect anytime via Settings → Connectors
- Click Continue

Step 3 — Get started on the HealthEx connection page
- Click Get started
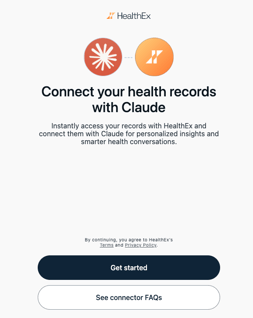
- You will be taken to the HealthEx connection page and prompted to sign in
- Choose how you'd like to continue:
- Continue with Google — sign in with your Google account
- Continue with Microsoft — sign in with your Microsoft account
- Continue with CLEAR — use CLEAR to verify your identity and automatically locate your health records
-
If you chose Google or Microsoft → you will be signed in and taken to the provider selection screen where you can manually add providers. Skip to Step 9.
-
If you chose CLEAR → continue with Steps 4–8 for identity verification and automatic record location.
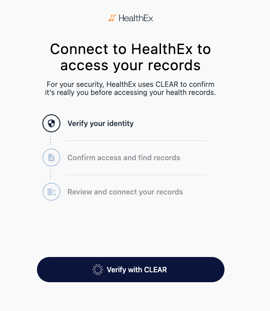
Step 4 — Verify your identity with CLEAR
- HealthEx uses CLEAR to confirm your identity before granting access to your health records
- You will see a 3-step progress flow: Verify your identity → Confirm access and find records → Review and connect your records
- Click Verify with CLEAR
Step 5 — Accept CLEAR's verification terms
- A CLEAR consent dialog will appear listing information they will collect
- Have your mobile phone ready for a selfie photo
- Click Accept & Continue
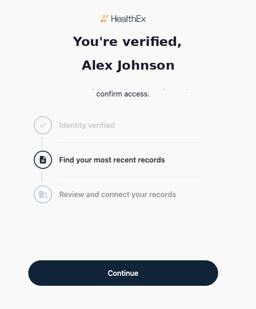
Step 6 — Identity verified — continue to find records
- Once verified you will see "You're verified!"
- Click Continue
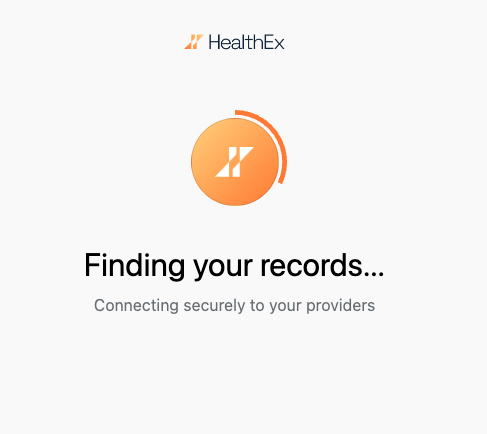
Step 7 — HealthEx locates your records
- HealthEx will securely connect to your health providers in the background
- This may take a few seconds — do not close the window
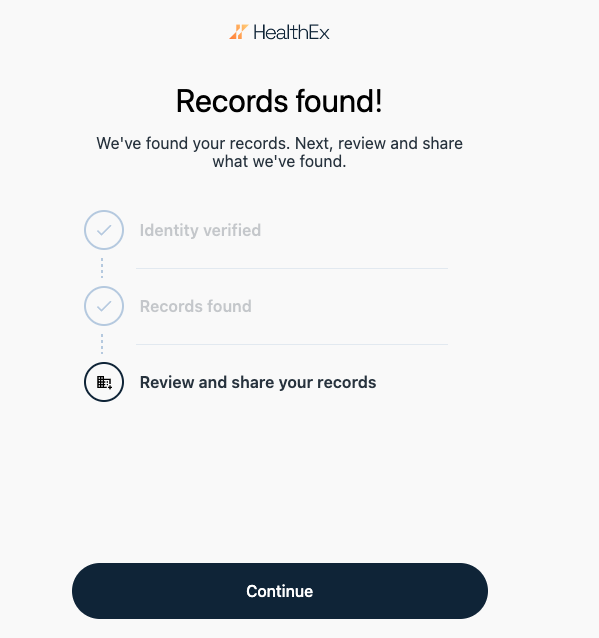
Step 8 — Records found — review and share
- You will see a "Records found!" confirmation screen
- Click Continue to review which records will be shared
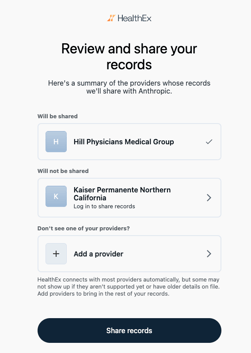
Step 9 — Review providers and share your records
- You will see providers split into two sections:
- Will be shared — providers HealthEx has access to
- Will not be shared — providers requiring additional login
- Click Add a provider if yours is not listed
- Click Share records to complete the connection
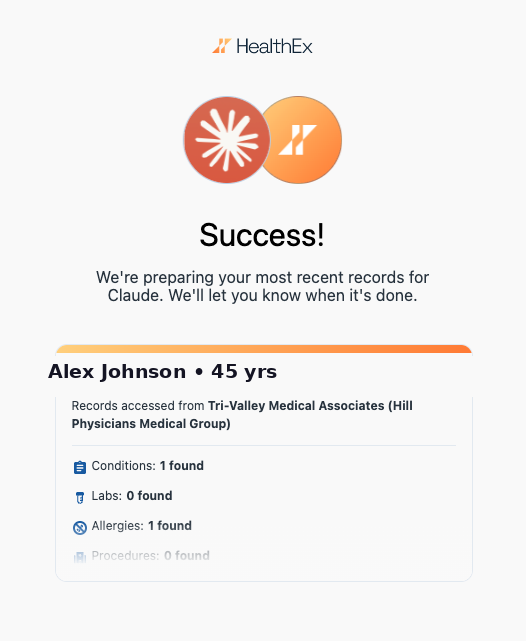
Step 10 — Connection successful!
- A "Success!" screen confirms your health records are now connected to Claude
- You will see a summary of records found including Conditions, Labs, Allergies, and Procedures
- Return to Claude and try asking: "What conditions are in my health records?"
What data does the connector access?
| Data Category | Description |
|---|---|
| Conditions | Active and historical diagnoses |
| Medications | Current prescriptions and dosage details |
| Lab Results | Blood work, urinalysis, and pathology reports |
| Vitals | Blood pressure, weight, heart rate, BMI |
| Immunizations | Vaccination history and dates |
| Allergies | Known allergies and intolerances |
| Procedures | Surgeries, imaging, and diagnostic procedures |
| Clinical Visits | Visit history, providers, and chief complaints |
Note: HealthEx provides read-only access. Claude cannot modify, delete, or add to your health records.
Disconnecting the connector
- Open Claude Settings → Connectors
- Find the HealthEx connector
- Select Disconnect on the top right corner
- Confirm when prompted
Note: Disconnecting removes Claude’s access to your health data immediately. Your records remain safely stored within HealthEx.